Delicious tasty cookies! I have yet to meet anyone who doesn't have a favorite cookie. Maybe not the classic chocolate chip or peanut butter cookie, but there is always a crumbly sweet memory from childhood. Almost everyone I meet has some taste or happy moment that involved a cookie. Sometimes it may have been decades ago, but nevertheless there is a cookie in their background. Regularly I get asked if I have recipes for some obscure cookie recipe from my friends and loved ones. Most times I am able to recreate something similar if not the exact recipe. One thing I am certain is that we are guided by our taste and scent memories. I know that they are stronger than our reality at times. Because of this I have always kept books of recipes to reference for such searches and still collect recipes from friends and various magazines.

When I came back to California a few years ago I found that some of the 'family' recipes of favorite cookies had become 'must haves' at Christmas and Easter, and there were a few new favorites. My sister-in-law possessed such a recipe. She graciously allowed me to learn her methods. She took a basic Betty Crocker Cookbook sugar cookie recipe and adapted it for our family's tastes. The cookie is a rolled-out sugar cookie with a few added flavors and frostings. Part of the taste was the icing. We would slip on a royal frosting icing and paint on our art. The actual recipe is great. You can freeze the raw dough before baking or simply leave it in the fridge overnight and roll out and cut the next day. The butter is critical and the cookie light and tasty before the icing.
Sandra's Sugar Cookies
- Ingredients:
- 1 1/2 cups powdered sugar
- 1 cup softened butter
- 1 egg
- 1 teaspoon vanilla extract
- 1/2 teaspoon almond extract
- 2 1/2 cups flour
- 1 teaspoon baking soda
- 1 teaspoon cream of tartar
- extra flour
- frosting for cookies (see below)
Steps:
- 1. Cream together powdered sugar, butter, egg and extracts. I use a Hobart mixer with the dough hook. Add flour, cream of tartar and soda, mix well. Chill at least two hours (overnight preferred).
- 2. Roll out on floured surface and cut into desired shapes.
- 3. Place on ungreased cookie sheet about two inches apart.
- 4. Bake 375 degree oven for eight to twelve minutes. They will be lightly brown. Cool a minute before transferring to a cookie rack with a spatula. Allow them to cool fully before frosting them.
Royal Icing
- Ingredients:
- 3 3/4 cups powdered sugar sifted
- 3 tablespoons meringue powder
- 7 tablespoons warm water (possibly more)
Steps:
Mix ingredients and beat well for at least four minutes until icing is smooth and drips evenly off a teaspoon. It shouldn't be too runny; it needs to be thick enough to set a hard crust on the cookie. If the icing is too thick, thin by adding half teaspoons at a time of warm water.
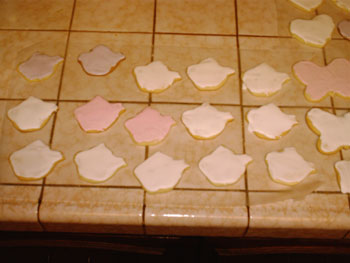
I use a spatula to spread the icing quickly over the cold cookies. Place it over a cookie rack with waxed paper underneath or be prepared to clean drips off the counter top.
 Icing dries really fast and needs to be kept covered while you are messing with the cookies. I place a piece of plastic over the top or a damp kitchen cloth. Once you have a layer on let them dry for several hours or overnight before painting or decorating.
Note: Please don't forget about ants. Ants love royal icing and basically anything to do with cookies. I do mean anything. Sugar scents the air and they do smell it. If you live in area prone to ants, like I do, then do what works. I place the drying cookies on plate on top of an upside down glass or bowl in a large glass or metal dish of water (glass helps making another surface they can't easily scale). No, I am not kidding. It beats explaining the moving black 'spots' on the dessert.
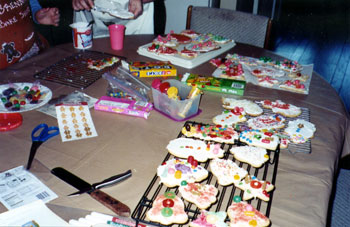
So to regress, once I had landed back home in California I began some new rituals. My brothers and sister had young girls. When I had left California six years before there had only been the rough and tumble boys for the most part and they had no real interest in baking cookies, just eating them. Seasonally I started having my nieces come over and I would bake sugar cookies or assemble pre-baked gingerbread houses in preparation for the day. Then the next few hours were spent frosting them and decorating as needed. Given the girls 'as needed' involved a few inches of sugar and tons of giggles and smiles. My nieces are sweet smart girls. Currently they range in ages ten to five. I began having them over to decorate cakes and cookies years ago and found their joy and happiness at just putting frosting and candies on a cake or cookie to be delightful.
There is no wrong way in my book to decorate a cookie. My rule was if you made it you had to be willing to eat it. That cut down drastically on the five inches of sugar and candies my nieces wanted to do. We would make a day of it and simply enjoy the fun of giggling and frosting. The simple act playing with frosting and decorations on a butter cookie became an art form, as well as treasured memories I will keep safe forever.
I would bake the sugar cookies head of time (or in the case of the gingerbread houses assembled them with royal icing) and let them cool on racks while making the decorating frosting -- or realistically while I made the icing and they ran around the backyard screaming as only a group of girls can scream. (There is a pitch boys never quite hit.) So there are two methods of making sugar cookies in this recipe. Using a basic butter cream or even a can of ready made frosting and candies is one fast method of decorating sugar cookies. The butter cream frosting with candies added cookie is pretty much is one of those things that need no more explanation. But my favorite is more complex. It is multi-stepped and a tad more difficult.

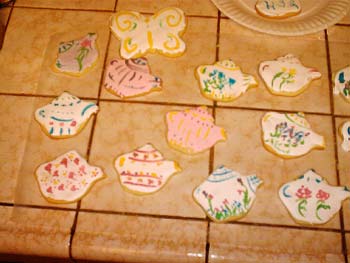
The process involves slathering on a slight layer of water thinned royal frosting. I usually use the white icing but you can tint it with food coloring. The best food colorings are the paste type purchased at a cake decorating place or party store that has cake decorating supplies. Allowing the icing to dry completely is very important. Like I said it takes a few hours but once dried you then get to the fun part of painting designs on the cookie with powdered food colorings or piping on decorations. This is not for the faint of heart or those in a hurry. If you are in a hurry, open a can of Betty Crocker frosting and push some jelly beans on the top.
I wasn't able to do too much with a group of girls in the painting department of decorating but we had fun with the canned frosting and candies. My older niece and I have had some fun over the years taking our time painting cookies. It takes some patience and I like to use paint brushes (new unused ones are my preference) for applying the colors.
My sister-in-law picked up some food paints on one of her trips to Mammoth. She found these powdered colors you mix with water and paint. The name is Bark & Bradley. Their website is still active and has choices of designs and products [ http://www.barkandbradley.com ]. They have more than one kit available with different colors. You can also use thinned paste colors but I prefer the powder for consistency and control. Then the design part comes into play. We had fun arbitrarily making silly dots and funny faces. Creativity is cool but the dye kit did come with some directions and designs if you aren't in the mood for heavy thinking. And the best thing about making painted sugar cookies is all the mistakes are easily disposed of with a glass of milk.

12/20/2012
03:02:03 PM